Transfers, Approvals and Balance Screens
1. To complete the below steps we are going to use the "Bank 2" and the "Central Bank" user. We're also going to complete the transfers etc. utilising the USD balances. Please note that the steps you are about to carry out are allowing you to create a specific payment network between the two parties to facilitate the transfer.
2. Navigate to the "Central Bank" user and log in.
3. Once you've logged in - go to the balances screen

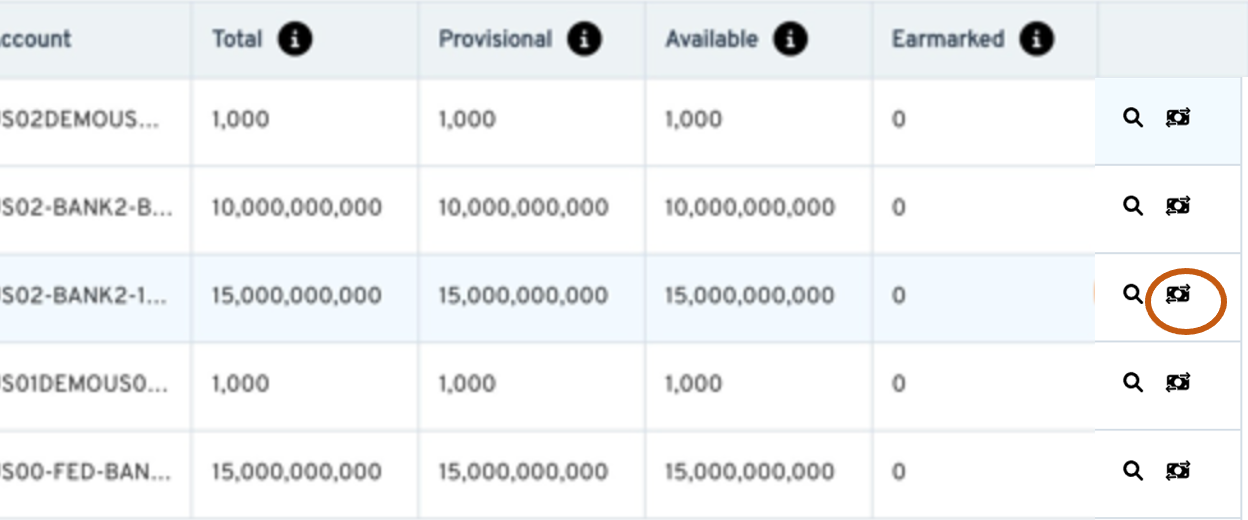
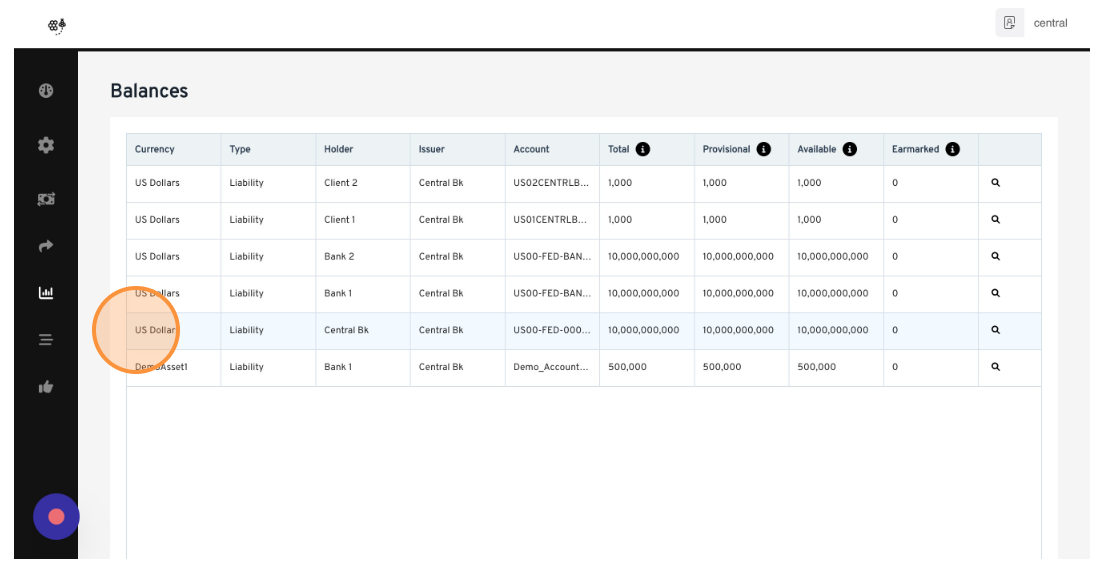
4. For this transaction we're going to need to Transfer funds from the Central Banks bank account - to the Treasury Account at Bank 2. Having logged in as the Central Bank User and opened the balances screen - navigate to the the "US Dollars" account where the Central Bank is both the "Holder" and the "Issuer". In this example you'll notice that the balance in the "Total" column is $5bn.
(Please note - The treasury accounts in the trial system when you first login all have a balance of $10bn - I have created different balances for this walkthrough so it is easier to follow - all the steps remain the same.)

5. Please now open the link in your sign up email and log in as the Bank2 User. Once open navigate to the Balances Screen.
6. In the Bank 2 list of balances you will notice the US Dollars account where the Holder is "Bank 2" and the Issuer is "Bank 2" - this is Bank 2's Treasury account - in this example you'll see that the starting balance is $15Bn.

7. Scroll to the right and next to the magnifying glass at the end of the row there is a Transfer Icon - click this.
8. This will take you to the transfer screen. The account identifier, the BIC code and the asset will all be populated. You'll then need to populate the amount you wish to transfer.

9. In this example I am choosing to Transfer $5bn.

10. In the "To BIC" field - enter the BIC code of the user you would like to transfer the money too - In this example I have selected the Central Bank - "CENTRLBK - Central Bk"

11. We now need to populate the "To Address". Please remember to leave this transfer tab open when completing the next steps.

12. We now need to enter the "To Address" for the Account where we would like to transfer the funds too. To do this, using a new tab, you will need to navigate back to the "Central Bank" User and navigate to the balance screen.
13. Acting as the Central Bank navigate to the main Central Bank Account.

14. Once located navigate to the right side of the table and select the magnifying glass.

15. Once the next screen opens - as per the earlier step for Bank 2 - please note down or Copy the Account Identifier / Address for this account. In this example it is "US00-FED-0000000000001"

16. Once you have the Central Bank Account/Address - please navigate back to the Bank 2 user transfer screen which you had left open on another tab from the earlier step - and type/paste the information into the remaining field.

17. Once the information is populated click the "Submit Request" button.

18. The new tab will show you the "Current Balance" the amount to be transferred and a provisional new balance.

19. If you are happy with the information shown on screen click "Accept"

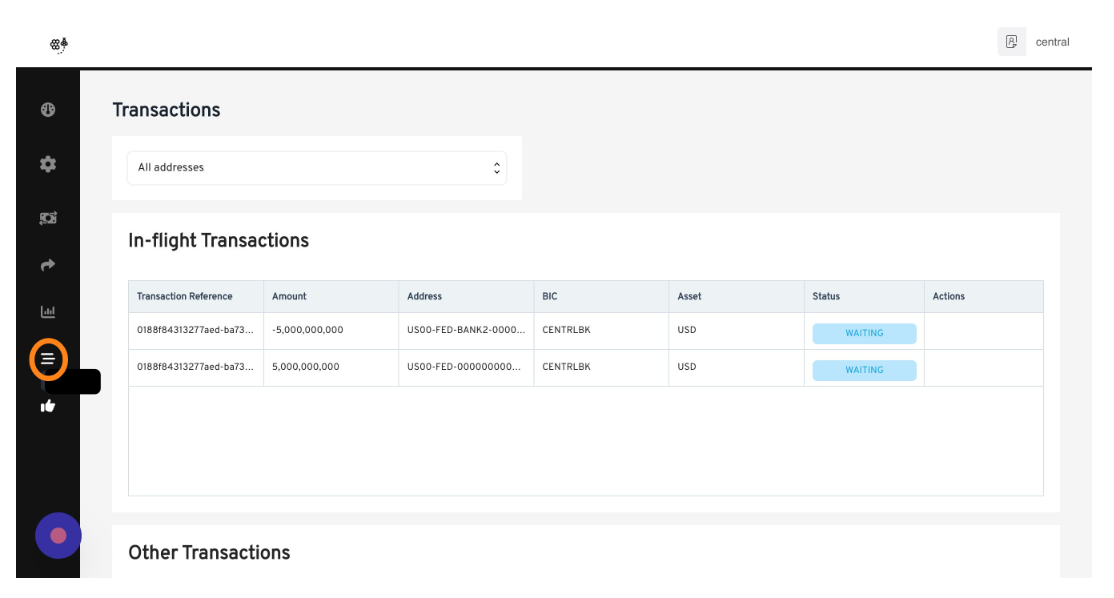
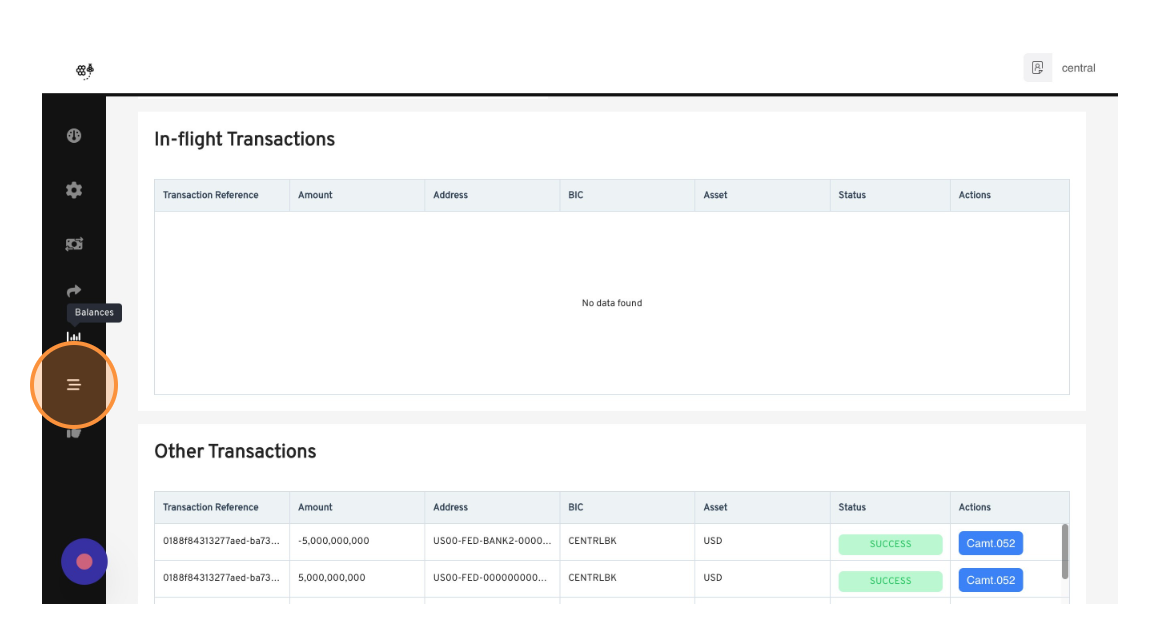
20. Click the transactions icon in the left hand naviagation menu.
21. If you navigate to the transaction screen - you will now see that this transaction is showing as an "In-flight Transaction" and is "Waiting" for the other party (i.e. the Central Bank) to approve.

22. Please now log back in as the "Central Bank" user. You'll see from the main dashboard that as the central bank you are being asked to approve 2 transactions (Nostro and Vostro) - please select "Go" to take you to the approvals screen.

23. Please note you can also navigate to the approvals screen directly in the left hand navigation panel. You will see that you have an action to review the transaction.

24. Before you review and approve the transactions - if you navigate to the Transactions screen you will see that the two transactions are now showing as "In-flight".
25. Navigate back to Approvals Section and select "Review"
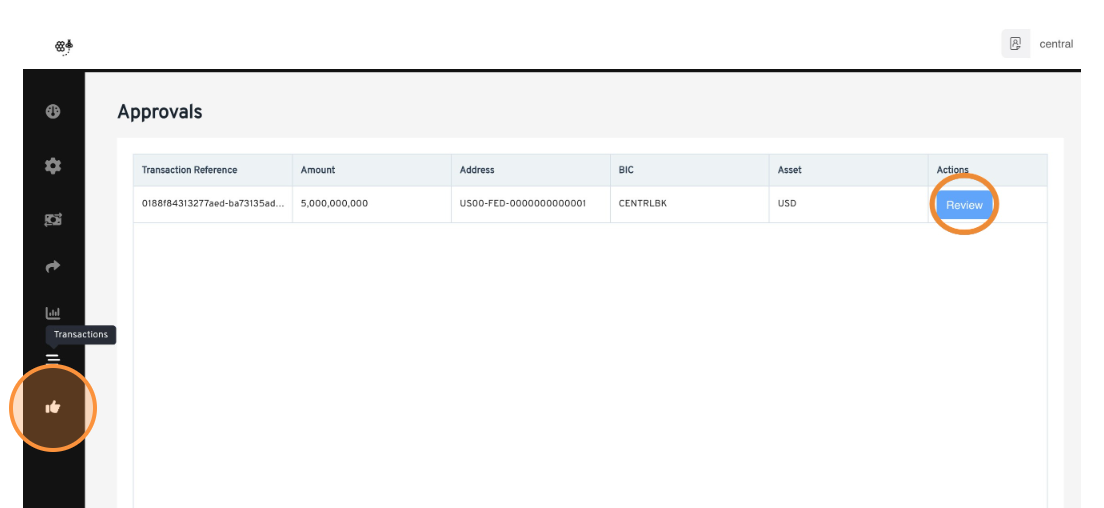
26. Click "Review"

27. Following clicking Review - the details of the transactions will appear. Once you are happy with these click "Approve"

28. Once approved the transactions will disappear from the "Approvals" screen and the dashboard will update to show there there are no approvals pending.

29. Upon looking at the Transactions screen - you'll see that the two transactions are now "In-flight" and have the status of "Applied" - (Please note that if you reject the trade at this stage using the "Reject Button" the trade will reject and the transaction log will be updated with a "Failed" transaction).

30. Please now navigate back to the "Bank 2" user - upon logging in you'll see that the Dashboard has one transaction pending approval. Upon selecting "Go" you will be taken to the Approvals screen.

31. Once here click "Review"

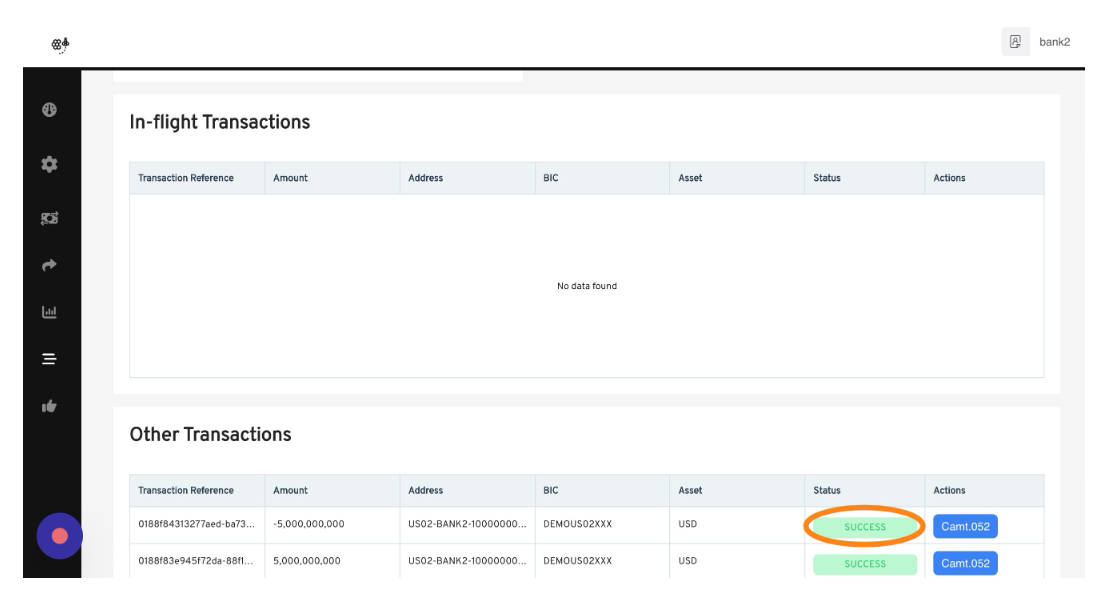
32. This will open a new modal which outlines the key terms of the transfer - once happy please select "Approve"

33. Once approved the transaction will appear in the "Other Transactions" section of the web page with the status showing as "Success".
34. If you navigate to the Balances Screen - you will see that the balance has decreased from $5bn to $10bn following the successful transfer.

35. If you now log in as the Central Bank User - you will see the exact same updates from the Central Bank point of view for both their Nostro and Vostro transactions as shown below.
36. Other Transactions updated for their accounts.
37. "US Dollars" balance is also updated.
38. This is the end of the Transfers, Approvals and Balances Section.